
The Essential Guide to Panorama Photography
Panorama photography seems quite daunting, but in reality it is a lot easier than you think.
A panorama is basically a long thin photograph of a big scene. It could be a mountain range, a large lake or a huge vista. Just something that you might not be able to fit into one photo with the lens you have … or you might have to shoot super wide and crop in on that photo, which is never a good thing as you would then be throwing away valuable pixels.
I think every photographer should be shooting panoramas … and I’ll let you in on a little secret … they’re not that hard to shoot!
I filmed this weeks on location landscape photography video in Pen Y Fan, in the Brecon Beacons. It’s an awesome place to visit and hike and gives you some spectacular views that are perfect for panoramas.
01. Principles of Photographing a Panorama
This is a technique whereby you take a series of photographs, and then afterwards merge them together in your editing program, to form one big photograph.
You can do a single row of photos, it could be as little as two merged together, or as many as you want … although the more you throw into the mix, the harder your computer will work.
You can also do multiple rows of photos … however it is easy to get carried away with this … I have tried over a hundred just for fun, and my computer had a little bit of a sulk and refused to give me the image … so just be aware of your computing power at home.
I have the M1 Mac Mini with minimal specs (8Gb Ram) and it takes about 3-5 minutes to stitch over 20 images together, so you can quite easily build a really big photo, with a relatively cheap computer.
02. The Basics of Taking the Photos for Your Panorama
To take a panorama photo all you need is a camera that has a manual mode setting:
Set the camera to manual mode
Set the ISO to 100
dial in the settings for the conditions you have on the day (If you’re not sure about this, see below)
With the settings you have, check the brightest parts to make sure the highlights aren’t blowing out (are too bright)
focus on the scene, then set the camera to manual focus ( in the image above, I’ve focussed on the mountain to the left)
Start to take the photos one by one, I normally shoot from left to right. Make sure you stop all movement before taking each one.
Overlap your photos by about half (So each photo has about half of the scene the last photo had in it)
As long as there is a decent overlap, the computer will stitch them together successfully
Shoot a bit wider than you think you will need. It is better to crop in afterward on your panorama, than to not have enough.
03. Check Your Photos for the Panorama
When you have finished, check all of the photos in the sequence. I’ll just make sure they are all sharp, in focus and have a decent overlap.
04. Editing Your Panorama Photo
I use Adobe lightroom classic but most editing programs are similar in the way they stitch your photos together.
Import your photos into lightroom using the import button.
Select all of your photos in the pano you want to stitch together by clicking on the first one, and then holding down shift and selecting the last one.
Right click on any one of the selected images.
Select Photo Merge, and then Panorama.
It may take a while to load up depending on your computer’s performance.
If they successfully stitch together, great job, if not, you probably didn’t get enough of an overlap.
In the popup window, select Cylindrical projection for single row panoramas and spherical projection for multi row panoramas.
If the horizon is a but wavey, play with the boundary warp slider to try to straighten it out.
Check Auto Crop
Click Merge
If it is a big pano, you might want to go and grab a coffee and leave your computer to do it’s thing …
Once done, edit as normal
05. Things to watch out for when stitching your panorama photographs together
It will be a big image once stitched together, so just be patient if your computer is taking a while to build it … also when editing, it will be a little slower.
This panorama below came out at 20,000 x 8,000 pixels, which is a 160 megapixel image! (Although to keep my website quick, I downsized it to 1000px wide.
If the computer doesn’t stitch them together successfully, you need to work on your overlap.
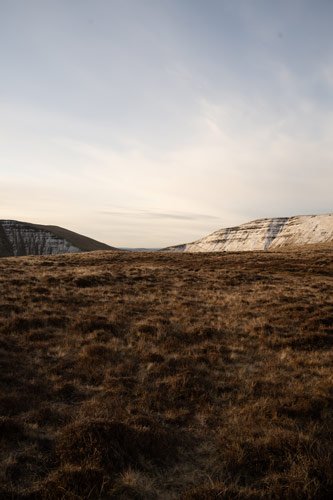
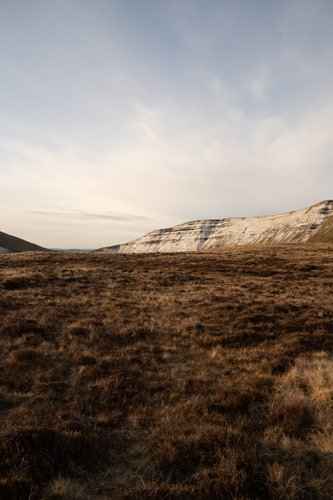
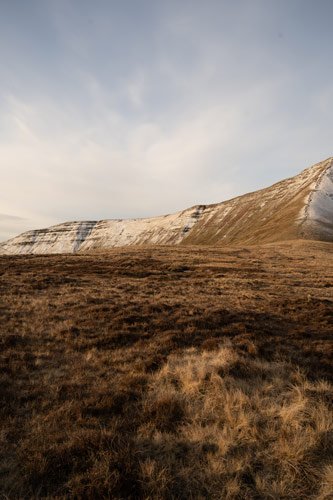
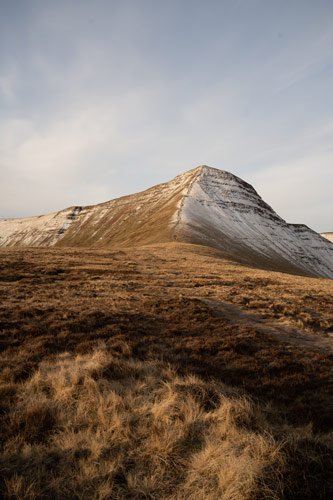
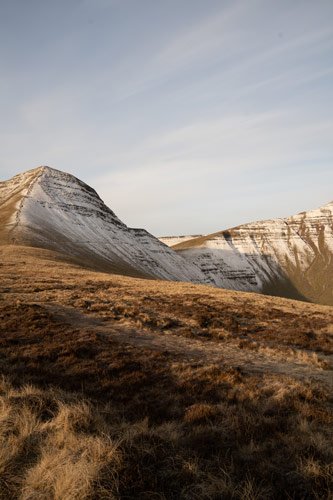
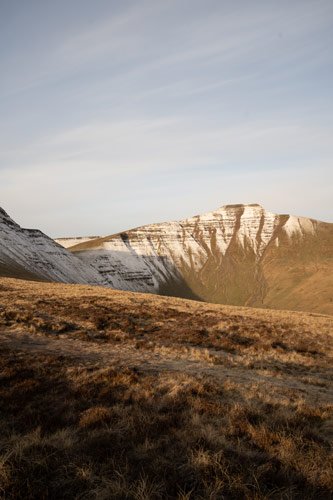
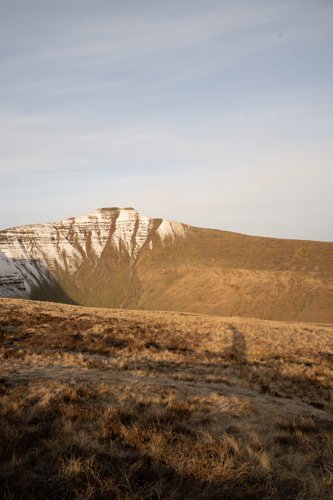
This shows the 7 single images I took for the panorama I photographed in the video.
If you look at these photos carefully, you can see most elements in the photographs are repeated in at least two of the photos. So with Cribyn, the peak in the middle, you can see the top of the mountain in photo 4 and photo 5.
I also shot a bit wider to the left to give me room to crop in post when determining the framing of the pano.

This is the final panorama from the 7 images above.
Panorama photographs are a great way to showcase a big landscape and if your wide angle lens isn’t cutting it, or if it just looks unimpressive. Try getting out a longer focal length and shooting a panorama.
I do this all the time and love it when I get a good panorama, but just in knowing that the process is relatively easy, is a great way to give you confidence to start shooting your very own panoramas photos.
If you aren’t sure about getting the right exposure in your camera, just put the camera in the auto mode and see what settings it gives you for the brightest part of the photo. Then copy these settings across to the manual mode setting and you are good to go.
This is actually a good way to get into manual mode photography as well … let the auto mode or the aperture priority mode do all of the hard work, and then just copy it, and then think about why it chose those settings …. and if you have time have a play around with your camera settings to see how they change your photos.
As for needing a tripod or a specialised tripod head … well I go deep into that idea in the video so make sure you watch it to see how I take most of my panoramic photographs.
The camera clip I always use: Peak Design Capture clip (It's expensive but well worth it!)
Want to buy a Camera today!?: Click here
My Equipment list:
Some of these are affiliate links, which means at no extra cost to you I will make a small commission, if you click them and make a qualifying purchase.
If you would like to see more, subscribe and turn on notifications for weekly videos, hints and tips and more. If you know anyone who would benefit from this video, please do share and like the video.
Thanks
Mike